In this tutorial, we will examine the installation and operation of react. which includes nodejs and vscode tools, and basic descriptions of the environment and tools are given in this tutorial
فهرست مطالب
Install Reactjs
To install and launch a ReactJS project, you can follow the following steps:
Install Node.js and npm
Building a React project
Go to the project folder
Project implementation
Start coding
Install Node.js and npm
First, make sure that Node.js and npm (Node.js package manager) are installed on your system. You can download and install the latest version of Node.js from the official Node.js website (nodejs.org). When installing, npm will also be installed automatically on your system.
Installing Node.js and npm (Node Package Manager) are the two main steps in setting up a development environment for developing JavaScript applications. Next, I’ll give you some tips on how to install Node.js and npm specifically:
Download and Install Node.js: The best way to install Node.js is through the official Node.js site. The Node.js site provides you with the latest version of the Node.js standard and LTS (Long Term Support). The LTS version is usually recommended, as it has long-term support and is more stable.
For Windows OS: Go to the Node.js website (https://nodejs.org) and download the LTS version. Run the downloaded file, enter the desired settings and install it.
For Unix-based operating systems (such as Linux and Mac): For these operating systems, it is best to use a package manager. For example, if you are using Debian/Ubuntu, you can use the following command:

sudo apt-get update
sudo apt-get install nodejs
npm install also comes with nodejs.
Installation test: After installation, you can see your Node.js and npm version by running the following command in the command line:

node -v
npm -v
These commands will show you the installed versions.
By completing these steps, you have Node.js and npm professionally installed and ready to use to develop your own JavaScript applications. It is recommended to always use Node.js stable (LTS) releases to have access to support and security updates.
Building a React project
To create a new React project, use a React project builder such as Create React App (CRA). You can create a new React project using the following commands:
First, open arm in the terminal or command line and run the following command:
![]()
npx create-react-app my-react-app
In this command, “my-react-app” is the name of the folder where your React project will be created.
Enter the project folder: After creating the React project, enter its folder. To do this, use the following command:
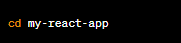
cd my-react-app
Project implementation
Now that you’re in your project folder, enter the following command to run your React project:

npm start
This command runs the project in development mode and presents you with a development server that opens the project in a browser. Any changes you make to the project code will be automatically updated in the browser.
Start coding
By executing the above steps, your React project is ready and you can start coding in its files and components. The main files include “src/index.js” and “src/App.js” where you can add your React code.
With these steps, you’ve created a new ReactJS project and can code and develop dynamic web applications.
Install vscode
To install Visual Studio Code (VSCode), a powerful open source development environment, follow these steps:
Get the software: Go to the official Visual Studio Code website at https://code.visualstudio.com/.
Download for your desired operating system: From the main page of the site, choose the appropriate version for your operating system. VSCode is available for Windows, Mac, and Linux operating systems.
Installation: After downloading, run the installation file and follow the installation instructions. This includes choosing the installation location, custom settings, and more. If you are on a Linux operating system, you may need to run additional commands to install.
Open Visual Studio Code: After successful installation, you can run Visual Studio Code. This software is usually accessible in the Start menu or Applications for Mac.
Installing extensions: One of the strongest features of VSCode is the ability to add extensions to it. With plugins, you can add various features and functions to the program by the developer community. Go to the “Extensions” section in the left pane of the VSCode customization and search for and install the extensions you want.
By following these steps, you will successfully install Visual Studio Code and be able to use this development environment to code in different languages.


